Posts

Editing Blog for Final Project: Cutting Shots
Image
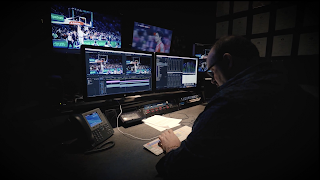
  Today was the first day that my group began our editing process for our Final Project. Having satisfactorily completed and compiled all of our final shots into one place, we were able to begin our editing process using iMovie, a software on iPhone which all of my groupmembers had previous experience with and was perfect for what we had in mind. In previous projects, this had been a relatively quick and simple process for everyone involved, as there were relatively few clips to edit and only basic audio to overlay on the clips. For this project, though, things were both easier and more complex. Fortunately, the majority of the audio was already in the actual film clips themselves, meaning that there was no need or strain to embed the actual diegetic audio. However, many of the clips were out of order, so I had to begin organizing them as another one of my groupmembers followed up with the editing of the clips. Once I had successfully organized all of the clips in order, and delete...

Filming Blog for Final Project: Redone Shots and Voiceovers

Image
      For today's filming, my group was mostly redoing shots and completing all our necessary voiceovers. After my group had filmed our previous "Base" Shots, one of my group members did more research in regards to what program we could use to display on the computer in the relevant shots, and discovered a program that offered capabilities more in line with what my group was hoping to achieve. After some collaborative discussion to decide whether or not each individual member found it worth it to redo the Base shots, we eventually agreed that it'd likely be worth it to improve the quality of our overall project, even though this did mean we'd have to collaborate and decide on yet another day to meet up at the same house in order to recapture the shots. Once we had finally coordinated and met up, we filmed the scenes, basically identically to before. I'd also helped create some more realistic background pieces in the interim between filming, again to help my pr...

Filming Blog for Final Project: Forest Shots

Image
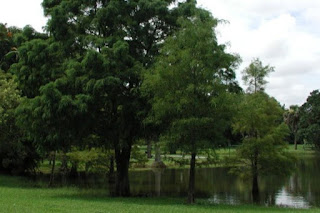
Today, my group was aiming to complete the second half of our shots- the shots and scenes which would be taking place in the forest. To accurately portray the forest environment, we met up at Easterlin Park, which has heavily wooded areas perfect for what I had in mind. Today, I was to be playing a part in front of the camera and participating in the actual filming. We first began setting up some of the mis-en-scene which I had helped acquire at our last filming venture, and once everything was arrayed in a way that was satisfactory, we began filming. The filming proceeded less than optimally- these scenes were going to be the bulk of the film, and there was much more dialogue and many more actions to remember and perform on cue. Due to this increased level of complexity, each scene had to be reshot at least twice. For my part, I didn't perform exactly stellar, but my performance- and memory- was enough to be passable, to the point where I didn't feel I had to reshoot. Due to ...

Filming Blog for Final Project: Base Shots

Image
  Due to time constraints posed by group members, we couldn't film many shots, so we filmed the few shots that took place in the area meant to be the Base in the actual film. To achieve the effect that my group was picturing, we used a nearby crafts store to acquire materials that we would use to create elements of the set that would perpetuate the futuristic aesthetic my group was aiming to create. I personally participated in the sketching and tracing of these materials while my groupmates helped arrange them. Since I finished my task before theirs, I helped look for some resources online which could create the radar effect that figured heavily into some of our scenes. I found several resources but there was one which was the obvious superior, so I went with that option as the one that my group would use. Once we were done with the creation and arranging of the background elements, we went to filming the actual scene. This was a scene which did not involv...

Storyboard Blog for Final Project

Image
  Scene 1: An establishing shot of the forest and surrounding area, panning from left to right. Scene 2: Close-ups on pieces of scenery, shown in close sequence. This will last from five to seven seconds. Scene 3: Close ups of scientific equipment on the forest floor. This will last for approximately five seconds. Scene 4: Long or wide shot of actors working through the forest, panning to follow as they walk, will last for about seven seconds. Scene 5: Medium long shot- filmed on eye level- of the actors speaking. This will last approximately ten seconds. Scene 6: High angle medium shot of equipment being set up. This will last for about seven seconds. Scene 7: Medium shot of a man at a computer with papers around him, filmed at eye level. This will last for around ten seconds as dialogue takes place. Scene 8: A close up shot of the man’s computer, possibly filmed as a POV or over-the-shoulder shot. This will last for around five seconds. Scene 9: An extreme close up of a bag of so...

Other Information for Final Project

Image
Location -  My group plans to film at Easterlin Park (1000 NW 38th street, Oakland Park, FL 33309) and at a group member's house.  Schedule- 2/26/22-2/27/22 - My group will gather all necessary props and costumes. Though it is important to my group that spending is kept to a minimum, I will go to a hardware and costume store to gather the necessary equipment I need for my group's characters, costumes and props. 2/28/22-3/3/22 - We will finalize and complete our entire storyboard. 3/5/22-3/6/22 -  My group will start filming. This means my group will go to the first location, Easterlin Park. While my group is at the park, scenes one through ten will be filmed; however, my group will only film the parts of these scenes that require the usage of the park. During these scenes, including myself, three members of my group will be acting while one member films. 3/9/22 - Filming will continue. My group will film scenes three, five, eight, and ten. The parts being filmed in these ...

Title Design Blog for Final Project

Image
  My group has decided to avoid using any more than two or three fairly simple fonts. The use of various fonts such as this would become a problem . The relative simplicity of only a few fonts is designed to avoid overloading the viewer’s eyes and the title growing too crowded and active. In addition, the use of many fonts tends to make any piece of writing extremely jumbled and feel as though it is not well organized. We also have to be mindful of color contrast, avoiding the titles blending in with the background at the moments they are shown. A bad contrast would look like this , seeing as a viewer can barely see the text against the white background. We must also be mindful of our font color depending on the background at the exact moment- a black color would work well on a white background, but not as well on a darker one. As a working idea, the main font will be reminiscent of a computer’s code text (in a technological sense) and the majority of titles will come off of a c...